I saw this scarf on anthropologie.com and loved it so much that I decided to make one. It isn't too pricey for non-college students working for $$ (its just $38.) but I thought it would be fun to make my own especially since I've been wanting to sew a scarf since forever. Follow the tutorial to make your very own tuxedo inspired scarf.
Materials:
- 2 yards of knit fabric (It required less than 2 yards but that is what I had, maybe more like 1 and 3/4 yards.
- Groovy scissors
- Sewing machine/or you can hand sew if you have the time :)
- Using your groovy scissors cut a long strip of your fabric measuring 20 inched wide x 66 inches long (the length of the fabric I bought). Your scarf will be half as wide as this since you will be folding it in half


- Cut smaller strips of fabric 6" wide and long enough to make ruffles to fit scarf (I joined 2.5 66" strips to cover my scarf.This will depend on how tight/loose you want your ruffles to be)

(Join the smaller fabric strips to each other by stitching seams at ends to form one long continuos strip. I did this with 1.5 of my [2.5] strips after the light bulb came on!)
- Sew a running stitch (DO NOT backstich at either ends) down the middle of the small strip


- Gather this strip by pulling the bobbin thread (stitching thread that is underneath the fabric) from both ends (DO NOT pull bobbin thread out of fabric as this will unravel the stitch. Pull from both ends a little at a time to get desired ruffle).


- Fold long, wide strip of fabric in half (length ways) and determine middle of this piece. Pin ruffle in place on top layer of this piece of fabric, being very careful not to pin through to the underlying layer of fabric.
- Open out folded fabric so that ruffle seems to be off to one side more than the other.

- Attach the ruffle to this piece of fabric by sewing a straight stitch at medium tension down the middle of the ruffle. You can use the running stitch as a guide.


- Fold fabric with ruffle back in half length ways, right sides facing, and stitch around edges using a 5/8 seam allowance. Leave a wide enough hole open at one end of the scarf, so that you can turn the scarf inside out.


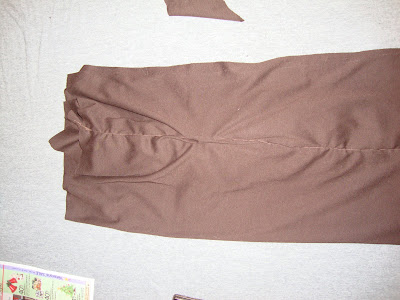
 I had excess ruffle that fell on the inside that I trimmed off once sewing around edges. Also I made a boo boo and got extra fabric caught in while sewing my ruffle down, see how it bunches up at some points? Good thing I can turn it over and no one will ever know, well except for you guys =)
- Trim off excess fabric as close to seams as possible(my photos don't show this, sorry) and snip edges at an angle to eliminate bulk when scarf is turned over. This also produces nice sharp edges ;)


- Turn scarf inside out and push out edges. Fold in edges of open hole and slip stitch closed.


- Iron your scarf (or not) for a nice finish
- Wear!


Cute, cute, cute!
ReplyDeleteI too saw that scarf and have it saved in my "to copy at home thriftily" folder! nice job!
ReplyDeleteI loooooove this so much! I can't wait to make one of my own and trust me I may have to bug you with questions I am a total dork when it comes to sewing. Great tutorial. Can't wait to ck out the rest of your blog :)
ReplyDeleteHi Everyone! Thank you for all the wonderful comments, I really appreciate them.
ReplyDeleteVintage Dutch Girl, I have one of those folders on my laptop in which I store all sorts of pictures of things I would like to create! Glad I'm not the only one ;)
Lacie, questions are always welcome. I will try my best to answer every and when you are done making it I would love to see a few pictures.
This is awesome. So simple to do too! Yay!
ReplyDeleteWorking on making about four of these for Chritmas!! Thanks for sharing! This is soooo cute!
ReplyDelete:) Thank you and good luck!
ReplyDeleteI am contemplating making a few and putting them in my shop for the hiloday season (and then Clair suggested It as well, thanks Clair.) So I'm thinking that after my semester is done I will add a few in different colors and probably do a new style. Will keep everyone updated.
I would love to see pics of the ones you guys make :)
I actually made this and its super cute!!! I am posting it today and will link back to you :)
ReplyDeleteOoohhh Lacie I can't wait to see :)
ReplyDeletei found you through another site...love this tutorial and can't wait to make it. Now I follow you too!
ReplyDeleteHappy Friday! I love this! I featured you today on my blog toptwentthings.blogspot.com I would love for you to stop by and grab a button!
ReplyDeleteAmanda
Thank you both Christy and Amanda!
ReplyDeleteAmand I'm off to take a peek at you blog, and thanks for the feature;)
This is amazing! Do you have any other Anthro-inspired tutorials? Or are you planning on making them?
ReplyDeleteThank you! I've been MIA for a long time but I may try my hand at a few more Anthro-Inspired Projects :)
ReplyDelete